You can add pictures to areas of the floor plan to give a better idea about how that area or room looks like live. People viewing the floor plan can click on the camera icon in the floor plan to view photos of that section of the property. The add picture tool located in the editor toolbar at the top of the screen, allows you to add pictures to your floor plan. The cursor takes on the shape of the camera icon to indicate that the current edit mode is set to add picture.

To Add Pictures:
| 1. | Select the add picture tool from the editor toolbar by clicking on it. |
| 2. | Move the cursor to the section of the floor plan you want to add the picture to and click on it. This inserts a camera icon  in that area of the floor plan. in that area of the floor plan. |
| 3. | The left side of the screen displays the Camera tab where you need to add details of the picture you want to add to the floor plan. |
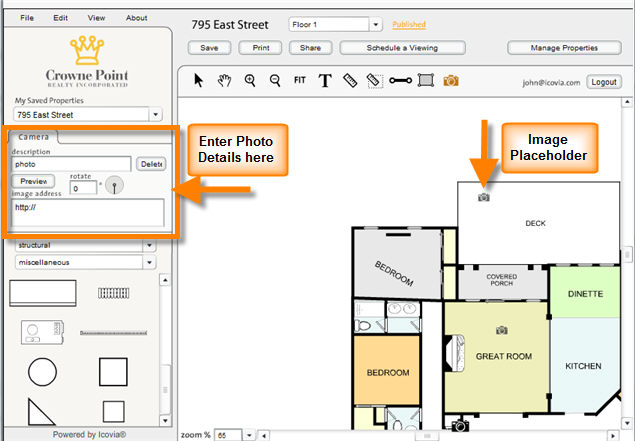
| 4. | Entering Photo Details: |
| a. | Type in a description of the photo you are adding and rotate angle if applicable. |
| b. | Then type in the URL to the photo location in the Image address box. |
| c. | Click on the Preview button to preview the picture specified in the link to ensure that you are adding the right picture. |
| d. | Click on the Delete button to remove the reference to the picture. This deletes the camera icon from that section of the floor plan. |


