|
<< Click to Display Table of Contents >> Add Flooring Tool |
  
|
|
<< Click to Display Table of Contents >> Add Flooring Tool |
|
The add flooring tool located in the editor toolbar at the top of the screen, allows you to add flooring to your floor plan.
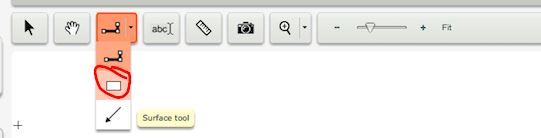
To Add Flooring:
| 1. | Select the flooring tool from the editor toolbar by clicking on it. |
| 2. | Click once in the section of the floor plan you want to add to floors to establish the location of the first point. |
| 3. | Then move your cursor and click to set additional points. |
| 4. | Click the “end” button when you’re finished. |
Note: If the “end” button obscures the next point that you wish to pick, just click as close as you can. The floor corner points are easily moved once the floor is drawn.
| • | You can add corners (breakpoints) once the floor is drawn by clicking on an edge while pressing the [Ctrl] key. Move the corners by dragging them. Delete corners by selecting the edge and clicking on the delete button at the corner. |
| • | To determine the square footage of a floor shape, click once on a floor with the selection tool. The square footage value will appear in the Floor Info panel on the left. |
Note: Edges of the floor will snap to 45° increments when the Snap walls 90° toggle is turned on. Turn this toggle off to have a floor with odd angles.
Note: You can also use the Area Dimension Tool to just measure the square footage of an area without having to add a floor.