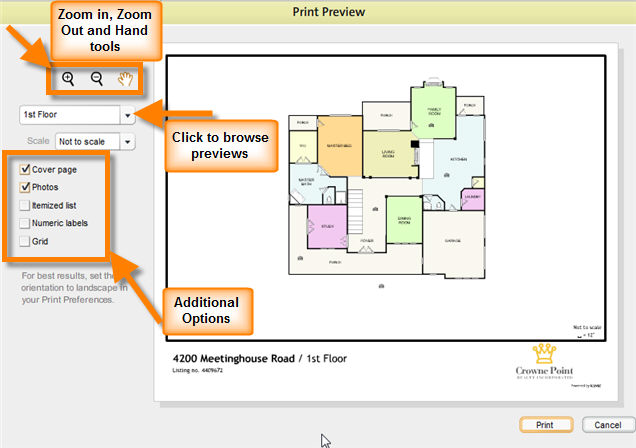
The Print Preview window is displayed when you click on Print in the file menu. It displays a preview of the floor plan you are trying to print, and a list of optional additional items that you can print along with your floor plan.
| • | You can preview the additional items by selecting the checkboxes and using the preview selection pull-down list to preview the item of your choice. |
| • | The preview window also has the zoom in, zoom out , and hand tools so that you can zoom in and out of the plan to a level that you want to use for printing and position the floor plan to be printed according to your preferences. |
Additional Options
| 1. | Cover Page: Selecting this option prints a cover page for the floor plan with a photo of the property, listing number and the realtor's logo. |
| 2. | Photos: Selecting this option prints all photos available for the property along with the floor plan. |
| 3. | Itemized List: Selecting this option prints an itemized list of all the icons used in the floor plan for each floor. The itemized list is an icon summary, containing all of the icon data that is seen in icon properties windows. If the floor plan is across two floors, a separate itemized list is printed for each floor. |
| 4. | Numeric Labels: Selecting this options assigns and displays a numeric label to each icon used in the floor plan. This feature is useful for easy reference to an icon. When this option is selected along with Itemized List option, the itemized list will include the numeric label for each icon. |
| 5. | Grid: Selecting this option displays the floor plan in a grid. |


